{Are you prepared to teach your children the Christmas story this year? Why not make your own family Advent Calendar to use year after year?
For part 1 of this series, click here...}
For part 1 of this series, click here...}
 I love what Noel Piper has to say about their family Advent Calendar:
“Mommy, Mommy! May I open the next window on the calendar?” A simple pasteboard Advent calendar with one flap to open on each day in December is probably the most familiar way to help a child understand the wait until Christmas. In the stores several themes are likely to be available, including Swiss mountain villages and Santa’s workshops. But since the Advent -- the coming -- we’re waiting for is Christ’s, let’s make sure our daily countdown has a real Christmas setting.For our family a more permanent calendar has become a tradition. When our first child was a toddler, I could find hardly any Christmas things that had to do with Jesus. So I created the Noel Calendar, a burlap banner with plastic and wood figures that by December 25 have been attached with Velcro across the top half of the banner to represent the Christmas story. Throughout the month, that story is told in increments, starting over at the beginning and adding a bit more each day.
The first year we used the calendar, I learned an important lesson: Repetition is an excellent way for a child to memorize. In mid-December, when Karsten was barely two, my mother-in-law died in a bus crash in Israel. With little time to plan, we were on our way from Minnesota to South Carolina to take care of my father-in-law, who had been injured. On an impulse I had tossed the calendar into a suitcase. In the midst of so much confusion, shock and irregularity, Karsten forgot everything he’d learned about potty training and too much of what he knew about behaving. But even though he could hardly make a whole sentence on his own yet, he could pick up the Christmas story at any point and keep it going, word for word, as he’d heard it day after day when we did the calendar.
...This period in Karsten’s life was the time when I began to realize the place of [repetition and regularity] in my life with my children -- repeating regularly the story that for centuries God’s people had longed to know.-Noel Piper, Treasuring God in Our Traditions, pp.78-79 (emphasis added)
We've been using our Advent Calendar for two years now, and William (who will be 6 next month) asked me this week if we're going to get out "The Green Thing" to count down the days until Christmas! I told him yes, two days after his birthday we'll get it out. He smiled, anticipation beginning already. This really works! (Even if the name "Advent" hasn't stuck yet…)
So. Back to crafting. Light a candle, turn on kids' Christmas music on the iPod…

...and get to work!
Make Your Own Advent Calendar: Part 2
Getting Started
1. Gather your materials:
- colored felt
- printed out paper patterns
- sharpie marker
- scissors
- Tacky Craft Glue or a hot glue gun
- safety pins


2. Safety-pin enough allowance at the top of your background piece so you can put a dowel through it later to hang it up.
Check Spacing
Check to make sure you have room on your background for everything you want to include:
- the title - "The Christmas Story"
- the finished manger scene underneath
- the 25 storage spots for all the pieces at the bottom
2. Under the title, lay out your paper patterns for your manger scene, the way you want it to finally appear on Day 25. Place a pencil or pen horizontally on your background to mark the bottom of the scene.
Start Making Pieces
Now you're ready to start making pieces!
1. First, if you haven't done this already, make a list of your 25 pieces and write down the colors of felt you want to use for the parts of each one.
 2. Then, start with any piece you like. I started at the beginning, with Mary, and worked my way down the list.
The patterns I found online seemed a bit plump, so I cut them down and traced around Mary’s body, head, and head covering on colored pieces of felt. Then I glued them together with generous dots of craft glue. (A hot glue gun would work better, but I didn't have one of those.)


I think Mary turned out well - simple, proportional, easy to recognize. (She’ll be the only one wearing blue.)
3. I went on to make Joseph, adapting my friend’s patterns to suit what I wanted.
4. Bethlehem came next: a long rectangle of gray felt behind and a brown square on top, with yellow lighted windows and doors.
4. Bethlehem came next: a long rectangle of gray felt behind and a brown square on top, with yellow lighted windows and doors.

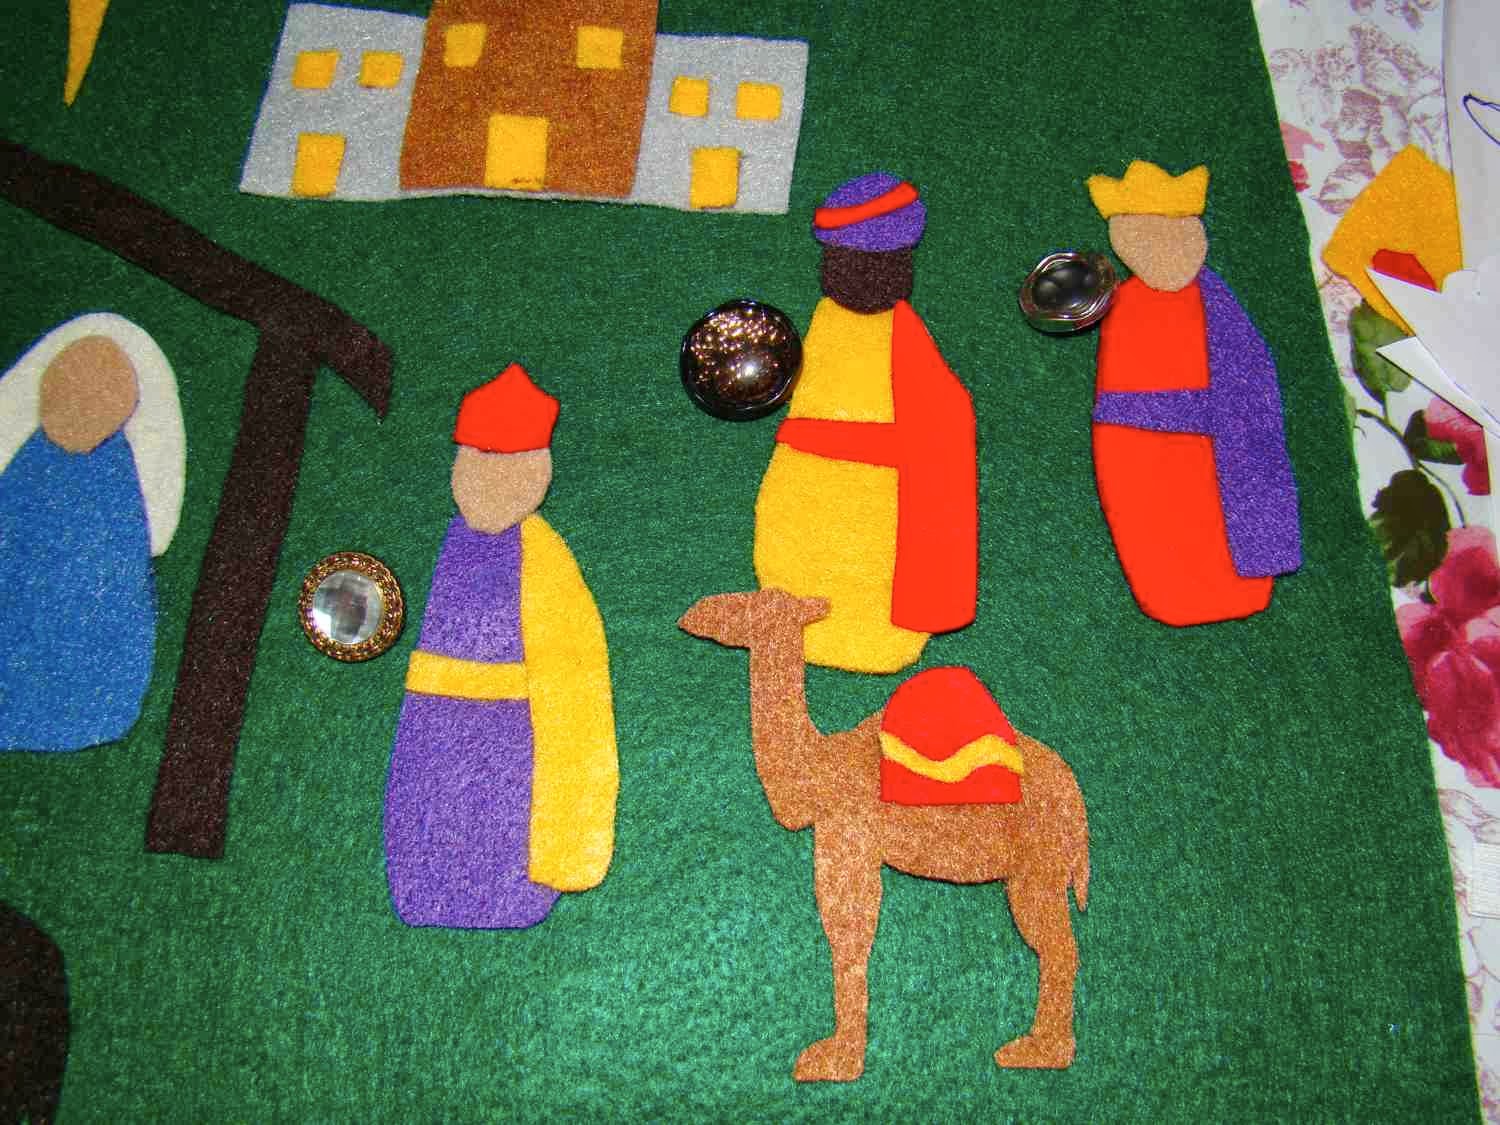
5. For the animals, I used my friend’s design for almost all of them, since her animals were the best. The only animal I had to draw myself was the camel, and I must admit, I'm pretty proud of him!

6. Use craft glue or a hot glue gun to attach a small square of velcro on the back of each character. {After two years of use, my craft glue still seems fine overall - only an occasional re-glue needed.}
{NB: It took me a couple sessions to finish all my pieces… But this is the time-consuming part - the rest is easy!}

All your pieces finished?
Congratulations! You've finished the hardest part! Keep going!

{For a copy of the Christmas story divided into 25 pieces, email me at carolyn@carolynbroughton.com}
0 comments:
Post a Comment
